Tag Archives: Chilis

Coconut & Peanut Poha

Standard

021114poha

Have you ever been searching for something in your pantry or kitchen only to find a whole package of something else? And then realize that you really should use it soon before it expires/stales/etc.? That’s what happened today when I found a very large bag of thick poha. It was a pleasant surprise since my hubby and I both love poha. In case you don’ t know about this unusual ingredient, poha is also called “beaten rice” and “flattened rice”. It’s basically a dried flattened raw rice product that can be used raw or cooked. Poha is used in Indian snacks, breakfasts, lunches and light meals in both savory and sweet preparations. It can be added to some dosa batters to thicken the batter. It’s an ingredient that is easy to work with and keeps a long time. Pick up a package next time you are in an Asian or Indian market! A few years ago I posted a recipe for the thin variety of poha.

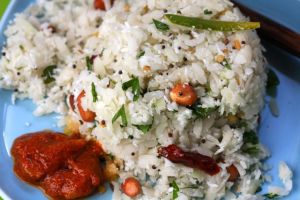
Here’s a simple recipe I made for lunch today that turned much better than I expected. I started looking in a few cookbooks for ideas, but didn’t really find anything that seemed new. My usual go-to recipe for thick poha uses onion and potato. That seemed too heavy for today. Therefore, I started out with a very basic recipe but tweaked it a bit by adding peanuts (for protein), cilantro for more flavor and lots of coconut. It turned out light, spicy and very tasty. I hope you try it too!

Coconut & Peanut Poha (Serves 4)

4 cups of thick poha
4 tbsp coconut oil
1/2 cup raw peanuts (or roasted peanuts)
2 tsp salt or to taste
1 1/2 tsp mustard seeds
2 tsp urad dal
1/2 tsp cumin seeds
2 dried red chili peppers, broken
1 green chili peppers, sliced
4 tbsp water
sprig of curry leaves
1/2 cup fresh or frozen (not sweet!) coconut flakes
cilantro – about 1/2 cup chopped
lemon slices

The poha is a little tricky. It’s easy to make it too soft so be careful. You don’t want it too soft and soggy nor do you want it “al dente”: Place the poha in a large colander or strainer and place in the sink. Quickly wash the poha with water running, using your hand to fluff it and get each grain wet. Let the water drain immediately. Let sit for a few minutes. It should have softened without any additional water. Taste a bite to see if it’s soft enough for you. When it’s ready, place it in a large bowl and set aside.

Heat a medium-sized pan of your choice over medium heat. Add the coconut oil and raw peanuts (if using roasted peanuts, skip this step). Allow the peanuts to fry a bit until they are browned. Once done, immediately remove from the oil to a plate (leaving the oil in the pan), sprinkle with a bit of salt and allow to cool.

Now add the mustard seeds to the oil. Once popping, add the urad dal, cumin seeds, red chili peppers, green chili peppers and curry leaves. Carefully add the water and allow it to cook off. This will make the urad dal soft. When the water is evaporated, pour this seasoning over the washed poha.

Now toss in the peanuts, coconut flakes and cilantro. Add salt to taste. Stir gently but well. If the poha is a bit too wet it may stick together. If that happens, just stir as gently as possible, breaking up pieces as you do so. Can you tell that I have experience at making the poha too soft? It’s okay if it happens, it will still taste good! Serve with some yummy garlic pickle and lemon slices to squeeze over.
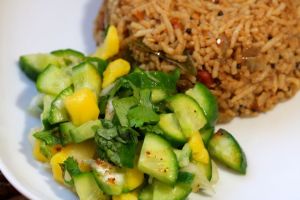
Refreshing Salad of Green Mango & Cukes

Standard

020514hero

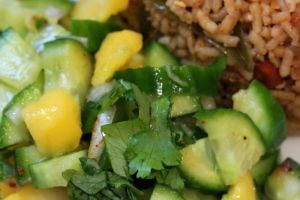
Hi! Today’s quick post is a simple mango and cucumber salad I made at lunch. I served it alongside some puliogare (tamarind rice) and it was fast and tasty combination. I had a slightly over-ripe green (sour) mango in the fridge. I actually saw a delicious looking green mango salad on another food blog yesterday (she has lots of great mango recipes). I got the inspiration to use mango in a salad today. Normally I make pickle with the green mangos or chop them up for bhel puri. Just didn’t get around to it, but I’m happy to say here is a great alternative!

The green mangos are smaller, firmer and much more sour than the usual mangos we get in US stores. You can find them in Asian markets and Indian markets. I have even seen them in a Middle Eastern market. If you don’t have “chat masala”, you can add cumin powder and a bit extra lemon. It isn’t the same, but it will still make a nice salad.

Refreshing Salad of Green Mango & Cukes

1 green mango (sour)
2 Persian cucumbers
1/4 cup of finely chopped onion
1/2 to 1 whole green chili pepper, finely chopped
1.5 tsp chat masala (or cumin powder)
salt to taste
juice of 1/2 lemon
1/8 of cup of chopped cilantro

Cut the mango and cucumbers into bite-sized pieces and place in a bowl. Add the onions, pepper, masala and salt. Stir well. Add 1/2 of the lemon juice and stir. Taste and add more juice and salt if necessary. Sprinkle the cilantro over the top. Serve chilled.

020514close

Savory Semolina Cake (Sooji Dhokla) + YouTube Debut

Standard
Savory Semolina Cake (Sooji Dhokla) + YouTube Debut

Hello and welcome to This Spicy Life!

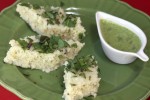
Yesterday was the debut of my YouTube channel featuring a Sooji Dhokla recipe by my friend Leena. I think you will agree that Leena does a great job of showing how to make this delicious and easy snack. Please forgive my lack of filmmaking skills! Anyway, I think the video came out much better than expected for our first try. Click on the video at the top right corner to see our tutorial. We are hoping this is the first of many collaborations!

Here is a link to the YouTube Channel for ThisSpicyLife: 

Dhoklas are a light and satisfying snack that is popular in India. They can be made from semolina (sooji) or chickpea flour and eaten with a chutney. Dhoklas are usually steamed in special pan inside a larger pot. You can easily substitute a small cake pan or pie plate, as long as it fits inside of a large pot. Here we used a 6″ cake pan set on top of a wok stand inside of a large stock pot. Add enough water to reach almost to the top of the wok stand and set the cake pan on top of this. Put the lid on and you have a homemade steamer.

Leena’s Savory Semolina Cake (Sooji Dhokla)

Serves 6 – 8

  • 2 cups semolina or sooji (medium size is preferred)
  • 2 tbsp yogurt (unsweetened – can use soy or other yogurt)
  • 2 – 4 tbsp ginger-chili paste (1″ fresh ginger blended with 4-6 green chilis)
  • 1 1/2 tsp salt (or to taste)
  • 2 tsp sesame seeds
  • 3 tsp eno fruit salt (available at Asian grocery stores)
  • 2+ cups of water
  • 6 tbsp cilantro, finely chopped
  • 6 curry leaves, chopped (optional)
  • 2 green chilis, thinly sliced (optional)
  • 1 tsp oil
  • 3 tsp mustard seeds
Method:
  1. Place the semolina in a large bowl. Add the yogurt, ginger-chili paste, salt and sesame seeds. Mix well.
  2. While continuing to mix, add enough water to make a medium thick batter.
  3. Set aside for 5 minutes. Add a bit more water if the batter has become too thick. You want the batter to easily fall in a chunky stream from a spoon.
  4. Oil your steaming pan (see note above about steaming) and set aside.
  5. In a small pan heat the oil to very hot. Add the mustard seeds and allow to cook until they start to pop. Add the curry leaves to the pan and immediately remove from heat. Set aside.
  6. Mix the cilantro and green chilis together and set aside.
  7. Remove 3/4 cup of batter into a smaller bowl. Add 1 tsp eno fruit salt and mix well. It will foam and bubble.
  8. Pour this into the steaming pan. Place the dhokla pan inside the steamer (see note above) and cover with the lid. Allow to steam for 8 minutes.
  9. Remove the dhokla pan from the pot.
  10. Sprinkle 2 tbsp of the reserved cilantro mixture over the top of the dhoklas.
  11. Sprinkle 1 tsp of mustard seeds over the top of the dhoklas.
  12. Using a pizza cutter or other small knife, cut the dhoklas into pieces approximately 2″ x 2″. Remove to a serving plate and serve with chutney.
  13. Repeat making more batches of dhoklas until the batter is done. There should be about 3 batches using a 6″ pan and 3/4 cup of batter to a pan.
Leena’s Green Chutney

Makes 1/2 cup of thick chutney

  • 2 tbsp raw peanuts
  • 1 tsp cumin seeds
  • 1 cup cilantro (coriander leaves) with stems and/or mint (leaves only)
  • pinch of salt
  • juice of 1/2 lemon
  • 1 or 2 green chilis, optional (to taste)
  • 1 clove of garlic
  1. Wash the cilantro and trim away any woody stems. Keep tender stems as they provide the most flavor. Clean the mint leaves but remove from stems and toss the stems. Set aside.
  2. Cut the green chili(s) and garlic into chunks and set aside.
  3. Blend the peanuts and cumin with about 1 tbsp of water.
  4. Add the cilantro/mint leaves, salt, about 1 tbsp of lemon juice, green chili and garlic to the peanut mixture.
  5. Blend until it becomes a fine, thick paste. Add more water if necessary to get it to blend smoothly.
  6. Adjust salt and lemon as needed.

Summer Salads: Sprouts & Kickin’ Kale

Standard

Hello! Welcome to This Spicy Life…

The holiday weekend is upon us. I hope you have a great weekend planned! I’m including two recipes for the (free) price of one today, in honor of the tradition of eating lots of salads and sides with the Independence Day feast. Well, most people do… some people only go for the barbecue!

The first salad is a cold salad made from mung bean sprouts (Indian-style, short sprouts). You will need to plan ahead a bit so that you have your sprouts ready to go when you want to serve this salad. It can take anywhere from 2 to 4 days to sprout the beans. If you are unfamiliar with sprouting, please see the Sproutpeople website. Just use a bowl if you don’t have a sprouter and use the instructions for the 1/4 – 1/2″ long sprouts.

The second salad is a creamy, spicy kale salad and can be eaten room-temp or slightly chilled. It isn’t really an Indian salad, but could still be served alongside an Indian meal.  Kale is one of my favorite veggies but I get bored with the usual preparations. For this recipe, I used Trader Joe’s Tahini Sauce for the tahini, but any plain tahini will work too. The TJ’s sauce has added lemon juice, garlic and salt. Any type of kale will do, but in this recipe I used the dinosaur kale (dark green with flat leaves).

On with the recipes…

Mung Bean Sprout Salad

Serves 2 – 4

  • 3 cups mung bean sprouts, 1/4 – 1/2″ long
  • 1 cup onion, finely chopped
  • 1/4 cup of cilantro, finely chopped
  • 1 tsp green chili, finely chopped (optional or to taste)
  • salt to taste
  • 2 tbsp lemon juice
  • 1 tsp oil
  • 2 tsp mustard seeds
  • 6 curry leaves (optional)
  1. Pick through the sprouts to remove any that didn’t hatch. These will be extremely tough and could break a tooth if you bite down unexpectedly! It will take a few minutes, but is worth the little bit of work. Any easy way to do it is fill your bowl of sprouts with water and skim off the top layers with your hand. Examine each handful as you place it in your colander, picking out any that aren’t sprouted. Keep doing this until you get to the bottom of the bowl. Then you can just pick out the remaining sprouts and toss the unsprouted beans (or keep them and cook them in some other recipe).
  2. Rinse the sprouts in cool water and drain in a colander or a salad spinner. Try to get off as much water as possible without disturbing the sprouts too much. 
  3. Place the sprouts in a large bowl and add the onion, cilantro, chili, salt and lemon juice. Mix gently.
  4. In a small saucepan, heat the oil over medium heat. Add the mustard seeds and curry leaves. When the mustard seeds start to pop, remove from heat and set aside until it cools.
  5. Add the mustard seed/curry leaf mixture to the salad and mix gently. Adjust the lemon juice and salt to your taste. Refrigerate until ready to serve.
Creamy Kale Salad with Spicy Sesame Sauce
Serves 2 – 4
  • 6 cups of kale, washed and cut into bite-sized pieces
  • 2 tsp oil
  • 4 cloves garlic, roughly chopped
  • 2 tsp dried red chili flakes (or to taste)
  • salt to taste
  • 6 tbsp tahini (or tahini sauce, see note above)
  • 2 tsp tamari or other soy sauce
  • lemon juice to taste
  1. In a large saute pan, heat the oil over medium heat.
  2. Add the chopped garlic and chili flakes and turn the heat to medium-low (so the garlic doesn’t burn).
  3. When the garlic starts to change color, add the kale and about a half tsp of salt.
  4. Stir and cover with a lid. Allow to cook for a few minutes, checking on the kale and stirring every few minutes. Add a few tbsps of water to keep the kale from burning if it seems to be getting dry.
  5. When the kale is nice and wilted and tender, remove from the heat and allow it to cool for a few minutes. (The cooking time can be influenced by the freshness of the kale and how much water was added during cooking, among other factors.)
  6. Remove the kale and any garlic bits to a bowl. Try not to pour too much water into the bowl if there is any left in the pan.
  7. Add the tahini and tamari/soy sauce to the kale mixture and stir. The mixture should have a creamy, smooth consistency. If it’s too thick, then add a bit of water to thin it out. If it’s too thin, add a bit more tahini.
  8. Now squeeze about 1/4 of a lemon over the kale and stir. Taste and add more if you like…
  9. Eat.

Fiery Fresh Mango Pickle

Standard
Fiery Fresh Mango Pickle

Hello! Welcome to This Spicy Life… Happy summer, everyone! Sorry I have been absent again for such a long stretch. We went on vacation for a few weeks in June. I have been trying to catch up with the home and kid stuff – the garden is wild with weeds and veggies and the kids are wild with energy and summer activities.

Today I’m featuring a spicy refrigerator pickle recipe from my friend Leena. We stayed at her house during our vacation and we ate this pickle with breakfast, then lunch and then dinner almost everyday! It was that good! She generously shared her recipe with me so now I am making it a staple in our home. BTW, Leena has a treasure trove of delicious recipes up her sleeve that I hope to include here in the future.

If you have never tried Indian pickles, you are in for a treat. They are spicy, but sometimes sweet, tangy, crisp and salty morsels of goodness that usually accompany simple Indian meals. Meals like rice and dal or roti and raita/yogurt can be made into something a lot more fantastic by the addition of a little pickle on the side. You can buy pickles at Indian grocery stores as well as some regular grocery stores. Experiment with one or two brands to see what you like. We love pickle so much in our house that I just counted 16 jars/bags of pickle ready to eat. Some good basic pickles to start out with are lemon, mixed pickle and maybe tomato or garlic.

The following recipe is a simple pickle to make but it may be a little difficult to find the ingredients. The green mangoes that are used are not the typical sweet variety that are found in most grocery stores in the US. They are a different variety of mango that stays sour (but with a mango taste) even when they become soft. This mango can be found in many Indian / Asian grocery stores and sometimes in Latin stores. If you find them, try to get the firmest fruits possible.  

The other ingredient that should be readily available at an Indian grocery is “Pickle Masala”. Choose one that contains only coarse red chili and fenugreek seeds (and maybe salt). I found a couple of different brands in my local store.

The pickle will take a few days to ripen and it tastes better the longer it sits. Be sure to put the pickle in a sterilized or very clean jar as this will help the pickle keep longer in the refrigerator.

If you don’t know how to cut mangoes, check out this link.

Fiery Fresh Mango Pickle

Makes about 4 cups

  •  4 firm green mangoes, peeled and cut in small chunks
  • 2 tbsp turmeric powder
  • 6 – 10 tbsp “pickle masala” made from course chili powder and fenugreek seeds
  • Salt to taste
  • 1/2 cup oil (canola, grapeseed or olive oil – not extra virgin)
  1. Place the cut mango in a large bowl.
  2. Stir in the turmeric powder.  
  3. Allow to sit for 1 hour at room temperature.
  4. Move the mango pieces to a colander and allow to drain for 15 minutes.
  5. Spread the mango pieces on a tea towel (an old one since the turmeric will stain) or paper towels.  Pat dry and allow to sit at room temp for 30 – 60 minutes. 
  6. Return the mango pieces to the bowl and add 6 tbsp of the masala and about 2 tsp salt. Mix well and taste. Add more masala and salt until you have the flavor that you like. Pickles are supposed to be spicy, so don’t hold back too much! Also, the “raw” masala hasn’t mellowed yet, so the pickle may have a somewhat bitter taste at this point. Have faith…it will turn out great!
  7. Cover the bowl and let it sit at room temp for two days, stirring once in the morning and once in the evening.
  8. Place the pickle (it’s almost done!) in a sterilized or extremely clean glass jar with a tight-fitting lid. Pour the 1/2 cup oil over the top of the pickle and put the lid on the jar.
  9. Place the jar outside during the day in the sun for a course of two days. (When I made this the first time we had very hazy, cloudy days. I didn’t place it outside but did let it sit out on the counter in my kitchen – it turned out fine.)
  10. You will see that most of the oil is absorbed into the mango and the masala. The pickle is ready to eat. Store in the refrigerator. This should last for at least several weeks or longer.  

Simple Tomato Curry with Aloo Parantha

Standard
Simple Tomato Curry with Aloo Parantha

Hello & Welcome to This Spicy Life…

Today I’m featuring one of my husband’s recipes. He has adapted it over the years, though it is probably similar to many tomato curry recipes out there. His is much simpler and is definitely my favorite! This is best made with fresh, homegrown tomatoes but can also be made with store-bought tomatoes. This just might inspire you to go and plant one or two tomato plants this summer!

We usually eat tomato curry with aloo parathas. It is equally delicious with mooli (daikon) parathas or even rice. The combination makes for a simple, home-style lunch or dinner. I’ll post the aloo paratha next week.

Notes: You may want to remove the tomato skins before cooking if you are serving this for guests or if the tomatoes have very thick skins. Tomato skins actually contain fiber and nutrients so I normally don’t remove the skins. To remove the skins: bring a pot of water to boil. Slash a shallow “X” in the bottom of each tomato. Drop the tomatoes into the boiling water for a minute. Remove the tomatoes to cold water. Slip off the skins.

Simple Tomato Curry

Serves 4

Ingredients:

  • 6 large ripe tomatoes (about 4 cups chopped), washed and cut into pieces (approx. 1″ x 1″)
  • 2 tsp oil
  • 2 tsp cumin seeds
  • 1 large onion, chopped
  • 6 cloves garlic, roughly chopped
  • 2 green chilis, finely chopped (or to taste)
  • 1 tsp salt (or to taste)
  • pinch of sugar (optional)
Method:
  1. Heat the oil in a medium-sized saucepan over medium heat.
  2. Add the cumin seeds and cook for about 1 minute. They will start to turn darker brown.
  3. Stir in the onions and allow to cook until they start to turn translucent.
  4. Stir in the garlic and green chilis and cook until the garlic is fragrant and the onions start to turn brown at the edges.
  5. Add the tomatoes, salt and sugar (if using) and turn the heat to low. Cook for 5 minutes or until the tomatoes just start to break down, but still hold their shape.
  6. Taste for salt and serve with parathas or rice.

Chole Enchiladas with Roasted Jalapeno

Standard
Chole Enchiladas with Roasted Jalapeno

Hello and welcome to This Spicy Life…

A few weeks ago I made Chole Enchiladas – a perfect fusion of Indian chickpeas curry and Latin whole wheat-corn tortillas.I thought this would be a great recipe to honor Cinco de Mayo that is coming up in a few short days.

I used a variation on my recipe for chickpeas curry posted here. You can use your own recipe or mine, just make double the recipe for the sauce so that you have sauce left over to pour over the rolled up enchiladas. The chole that I made was already spicy but made extremely spicy with the roasted jalapeno peppers added to the filling. If you want less spice, just remove the seeds and maybe use less jalapeno.

Chole Enchiladas with Roasted Jalapeno

Serves 4

  • 1 recipe chole, made with doubled sauce
  • 1 cup potato, minced
  • 6 whole wheat-corn tortillas or other tortillas (6″ – 8″, not the huge burrito size)
  • 2 jalapeno peppers
  • 1 cup cilantro, chopped
  • 1/2 cup onion, chopped
  • 1 lemon, cut in wedges
  • 1 avocado, chopped
  1. Preheat oven to 350F. Prepare an 8″x8″ or similar baking pan by rubbing with a bit of oil. Set aside.
  2. Roast the jalapeno peppers: there are many methods to do this. I put mine over direct gas flame and kept turning until the skin was blackened. (You can oil them and place under a broiler or put them in a cast iron skillet and turn them around over high heat.) Once roasted, set aside until they are cooled. Then with the back of a knife (the dull side), scrape off most of the charred skin. Don’t rinse under water as this removes much of the flavor. Chop into bite-sized pieces. You can remove the seeds if you find them too hot. Be careful to wash your hands well after handling the jalapeno! Set these aside until step 6. 
  3. Prepare the sauce part of your recipe for chole / chickpeas curry and remove all but 1 cup of sauce and reserve until step 7.
  4. Add the minced potato to the 1 cup of tomato sauce. Allow to simmer until almost cooked through. Add a small amount of water if it becomes too dry.
  5. Add the reserved chickpeas to the potato mixture and simmer for 10 minutes, adding a bit of water as needed so it doesn’t stick. However, this should be a very dry curry at the end of the cooking time.
  6. Stir in the chopped jalapeno and 3/4 cup of chopped cilantro. Taste for salt/seasoning and set aside.
  7. To the reserved portion of the tomato sauce, add a little bit of water to make a thick gravy consistency (if necessary). Set aside.
  8. Wrap the tortillas in foil and place in the oven for a 5 minutes. They will get a little heated and more pliable. 
  9. Into an oven-proof casserole dish pour 1 cup of the reserved sauce. Spread over the bottom.
  10. Take one tortilla and spread approx. 1/2 cup of the chickpeas on the center. 
  11. Roll up and place in the casserole dish. Repeat with remaining tortillas and pack tightly together. 
  12. Pour remaining tomato sauce over the rolls – be careful to get sauce all over the tortillas (they may become dry if they aren’t sauced). 
  13. Cover with an oven-proof lid or foil. Place in the oven for 30 minutes or until heated through.
  14. Remove from the oven. Remove lid or foil. Allow to stand for 5 – 10 minutes.
  15. Serve with chopped onion, cilantro, chopped avocado and lemon wedges.


Vegetable Manchurian with Spicy Cilantro-Garlic Gravy and Fried Noodles

Standard
Vegetable Manchurian with Spicy Cilantro-Garlic Gravy and Fried Noodles

Hello! Welcome to This Spicy Life…

Have you ever had the delicious combination of Indian and Chinese food? If not, this is a new taste adventure you are sure to love. Indian-Chinese is very popular in India, and it’s offered on lots of pub menus and restaurant menus. There’s nothing quite as good with a cool drink as a fried vegetable ball dripping with a spicy garlic-chili sauce! Or a crispy, spicy baby corn spear… this cuisine is not for the spice-challenged person!

There are many varieties of Manchurian – some are “dry” (without a lot of gravy), some are “wet”. Some use tomato product in the sauce, some don’t. All of them are highly flavored with some type of fried ball or battered pieces of vegetable, paneer or chicken.

My favorite recipe for Veg Manchurian is the following recipe from (my Dear Mother-in-Law) Shyamala Kallianpur‘s cookbook “Green Leafy Vegetables”. (Unfortunately it is out of print right now, but she is hoping to make it available again! The book is a treasure trove of healthy Konkani vegetarian cooking with some bonus recipes thrown in.) Without further delay (as many people have been asking for this recipe!!!)…

Vegetable Manchurian with Spicy Garlic-Cilantro Gravy

Serves 6

This is a two-part recipe. Make the balls first, set aside and then work on the sauce. Making both at once is a little hectic unless you have some help in the kitchen!

For the Vegetable Balls:

  • 1 cup spring onion leaves (green part only)
  • 1/2 cup green beans
  • 1 cup cabbage
  • 1/2 cup carrot
  • 1/2 cup bell pepper
  • 2 small potatoes (approx 1 1/2 cups), boiled, peeled and mashed
  • 4 tbsp cornstarch
  • 1/2 tsp soy sauce
  • 1/2 tsp chili sauce (the red sauce in a bottle)
  • salt to taste
  • 2 – 4 cups oil for deep frying
Method:
  1. Finely cut the first 5 vegetable ingredients. Cut as finely as possible – a food processor is the fastest and easiest but you can also use a grater or a knife.
  2. Heat a large wok or frying pan over medium low heat. Put the vegetables in the pan along with 2 tsp of salt. Stir occasionally and allow to cook for 5 minutes. The vegetables will just start to steam/sweat a bit, not brown.
  3. Remove from heat and allow to cool.
  4. Add the remaining ingredients except for the oil. Mix together well using a spoon or your hands. Test for salt level and add more if necessary.
  5. Form into 1″ diameter balls and flatten slightly. Deep fry until dark brown. Drain and set aside.
For the Gravy:
  • 2 tbsp oil
  • 6 – 12 green chilis (or to taste), grind into a paste with a little water
  • 30 cloves of garlic, minced – don’t be shy with this…it mellows out with cooking!
  • 1/2 cup spring onion leaves (green part only), finely chopped
  • 1/2 cup cilantro, finely chopped
  • 3 – 4 tbsp soy sauce
  • 1/2 tsp chili sauce
  • 2 tsp vinegar
  • 2 tbsp cornstarch
  • salt to taste
  • 3 cups of water
Method:
  1. Heat a medium or large frying pan over medium low heat. Add 2 tbsp of oil and then the green chili paste and minced garlic. Fry slowly, stirring often until it starts to turn brown. This takes a long time to turn brown…just take it slowly and keep a close eye since it will burn quickly at the end.
  2. Add the cut spring onion and 1/2 of the coriander leaves. Mix well and cook for 4 -5 minutes. You can add a little bit of the water if it starts to stick too much.
  3. Mix the sauces, vinegar, cornstarch, and about 1/4 – 1/2 cup of water in a separate bowl to make a thin paste. Pour into the pan and stir to mix well.
  4. Stir in the remaining water and bring to a boil. Continue cooking (or add more water) until the consistency is that of a medium-thick gravy.
  5. Taste for salt and add if necessary.
  6. Remove from heat, add the fried vegetable balls and remaining cilantro. Serve hot with fried rice or noodles.

Breakfast Bread with Coconut

Standard
Breakfast Bread with Coconut

Good Morning! Today my Sister-In-Law and I made a breakfast dish called “Bread Usli”. It’s so easy to make and puts to good use any stale or last bit of bread that no one wants to eat! This is a common dish in India, often made for a quick breakfast or snack. There are so many varieties, but we adapted a recipe from “The Konkani Saraswat Cookbook” by Asha S. Philar. It is almost identical to the recipe given to me by my Mother-In-Law many years ago. Hope you enjoy it as much as we did…

Bread Usli

Serves 4

  • 15 slices of wheat or white (a combination of the two is best), chopped into small cubes about 1/2″ x 1/2″ x 1/2″
  • 2 tsp salt
  • 1 tsp sugar
  • 2 tbsp warm water
  • 3 tbsp oil
  • 2 tsp mustard seeds
  • 1 tsp urad dal
  • 2-4 red chilis
  • 5-8 curry leaves
  • 4 tbsp coconut (fresh, thawed frozen or desiccated)

Place the cubed bread in a big bowl. Dissolve the salt and sugar in 2 tbsp water. Sprinkle the water (using your fingers or a spoon) over the cubed bread, mixing the bread cubes so that the water is distributed pretty evenly.

Heat the oil in a large pan (a wok works well) over medium heat. Add the mustard seeds, urad dal, red chilies and curry leaves. When the mustard seeds start popping, reduce the heat to low and add the bread cubes. Gently stir, stir, stir, lifting the cubes from the bottom to the top. Keep stirring until the seasoning is mixed in with the bread cubes. Allow to heat for about 2 minutes over the low flame. When it’s done, sprinkle the coconut over the top and mix in gently. The texture of the bread shouldn’t be crispy or soggy. Serve.

Bread Usli

Garlicky Cilantro Chutney

Standard
Garlicky Cilantro Chutney

Garlic Cilantro Chutney

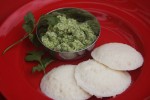
Hi! Today I made idlis (instant, not from scratch this time) with Garlic-Cilantro Chutney for my In-Laws who are visiting from Jersey. This is a simple chutney to make when you don’t have a lot of time to get food on the table. You can adjust the levels of garlic and chili to suit your taste. Be sure to use the cilantro stems because apparently these are the most flavorful part of the plant. Enjoy!

Garlic-Cilantro Chutney

Makes approx. 3 cups

  • 2 cups fresh (or thawed frozen) unsweetened coconut or desiccated coconut
  • 2 cups roughly chopped cilantro (stems and leaves)
  • 1-3 cloves of garlic, peeled
  • 1-2 green chilis
  • 1/2 tsp tamarind paste (or to taste)
  • 2 tsp salt (or to taste)
  • 1/2 cup or so of water
  • 1 tsp coconut oil or other cooking oil
  • 2 tsp mustard seeds
  • 1 tsp cumin seeds
  • pinch of hing/asafoetida
  • 4-6 curry leaves

Place the cilantro, garlic, chili(s), tamarind paste, salt and about 2 tbsp water in a blender and grind to a fine paste, adding more water as needed. Add the coconut and grind until combined and it becomes a rough mixture (but not too smooth). Add a little water at a time if it is too dry. Pour contents into a serving bowl. Adjust salt if necessary.

For the seasoning: heat the oil in a small pan. Add the mustard seeds, cumin seeds, hing and curry leaves and allow to heat until the mustard starts to pop. Immediately remove from heat and pour over the chutney. Mix in and serve with idlis, vadas, dosas, sandwiches, etc.

Please send me any comments or questions! I would love to hear from you and any ideas you come up with to use chutney…